|
Follow us!
 |
|
||
 |
|||
Set Up Instructions:
When your hammock arrives, practice setting it up in your back yard so you can get the “hang” of it BEFORE you take it out on your first outting.
Your rain fly is shipped with the seams NOT sealed. Since there are no seams directly over the hammock, this should not be an issue. But, it is a good idea to seal all the seams with a good seam sealer before using the hammock in wet weather. Hammock weight limit: Standard -290lbs,
ULtra Lite - 190.
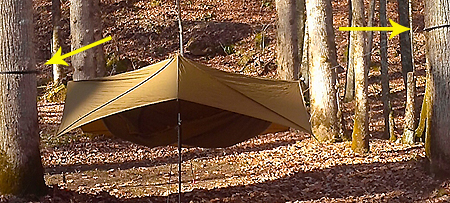
Caution: Avoid both large diameter and small diameter trees.
Large trees are harder to reach around while tying off your line and they may have larger dead wood in the canopy that could fall on the hammock causing injury or death. Small trees may not be able to support the weight of you and your hammock. Always check the canopy of the tree for dead or falling branches before setting up the hammock.
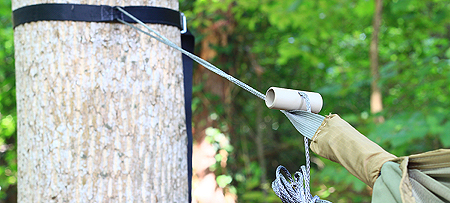
1. Find your trees. 8 to 12 inch diameter trees are best (21 inches MAX) and that are spaced 8.5 (MIN) to 15 (MAX) feet a part.
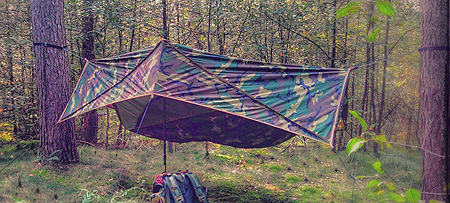 Note the tree spacing and tree size in this photo. This is the optimal size and spacing! 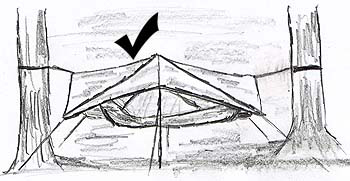 |
 If your trees are at the 15' limit, you will need to raise the Footline higher than the Headline. The Headline strap should be placed, on the tree, in line with the top of your shoulder for the proper entry way height to the hammock. 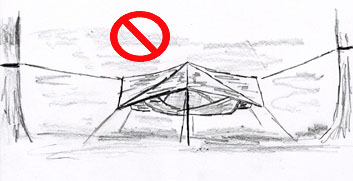 |
2. Set Up the Support Line. Our new support system allows your hammock to hang with minimal or no sag. This is the reason one support line is only 12 inches long. This SHORT LINE will go to the head of the hammock (the end with the attached stuff sack & PAK-IT-LITE© logo). THIS LINE IS NOT ADJUSTABLE.

The reason for this is simple: The majority of your body weight is in in your upper torso. For your hammock to hang in the proper manner that it was designed for, the weight of your upper body needs to be close to the tree or any vertical support you are using.
The LONG LINE will go at your feet and is adjustable.
* Decide which tree or vertical support will be at the head of the hammock.
* Wrap the webbing with the attached SHORT LINE around the tree at shoulder height. This is very important! At this height, the doorway should be at a comfortable level.
* Wrap the webbing with the LONG ADJUSTABLE LINE around the tree or vertical support for the foot of the hammock.
* Adjust the LONG LINE to its longest length.*
3. Hang the hammock. Take care to place the door so entry and exit of the hammock is easy and un-obstructed. You will know the door is facing you if the stuff sack is to your left.
* Start by hooking the webbing of the stuff sack to the toggle of the SHORT LINE. At this point the hammock should still be stuffed in the sack.
* Grab the webbing of the foot of the hammock (inside the stuff sack) and begin pulling the hammock out of the stuff sack and attach it to the toggle of the LONG LINE.
* While holding the toggle of the LONG LINE, pull the adjusting cord (this is the line coming through the toggle) until the hammock's ridgeline is taut.
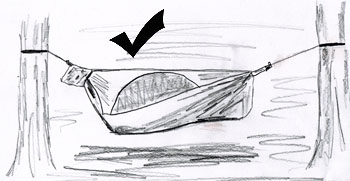
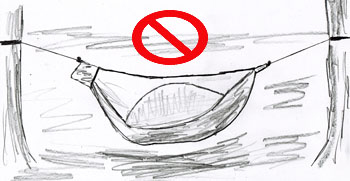
* DO NOT add more line to the headline! Just remember: The further your hammock is away from the tree, the more likley it is to sag.
* DO NOT allow the ridgeline to sag!
* THE 30º RULE DOES NOT APPLY TO A FIXED RIDGELINE HAMMOCK (it is already designed into the hang of the hammock).
*When adjusting the line note how the line runs through itself. When weight is applied to the line, this “sleeve” will cinch tight holding the line in place. To adjust the line this sleeve must be relaxed so the inside line can move freely. So, to tighten the line when hanging the hammock, push the toggle toward the tree while pulling on the adjuster line.
To loosen the line, pull the webbing off the toggle (removing any weight on the line) and pull the inside line at the top of the sleeve.
4. If using a closed cell pad for insulation, Open the pocket and insert the pad by working the foot end of the pad all the way down to the end of the pocket. Then, tuck the remaining pad into the head area.
5. Hang the rain fly (if needed) by unhooking one hammock end at a time and running the webbing loop through the rain sleeve on the fly. The rain fly peak should be positioned over the hammocks zippered door. Hook the hammock webbing loop and rainfly loop over the toggle button. If setting up in rain, hang the rain fly first, then hang the hammock.
6. Place your hiking pole into the grommet at the peak, then, stake out the fly starting with the front center guy line first and the centerline, at the back of the fly, next. Then, stake out each end corner ensuring the fly is taut. If conditions are stormy, keep the fly peak low and stake the front end corners out wider and more parallel with the hammocks ridgeline.
7. The pockets lining the inside of the hammock can be used for storage and added insulation during cold conditions. Use any dry clothing, fleece or down pants and jackets by stuffing them into the pockets. Lining both side pockets will keep you toasty warm!
Copyright © 2019 PAKITLITE.LLC All rights reserved